Huayna Picchu, meaning “Young Peak” in Quechua is one of Machu Picchu’s signature viewpoints – known by many due to its famous steep climb up the “Stairs of Death.” Also known as Wayna Picchu (pronounced the same), Huayna Picchu is one of two mountains situated next to the Machu Picchu citadel. For this reason, it is a must for hikers and thrill-seekers alike wishing to add an exciting and memorable adventure to their time at Machu Picchu. Keep reading to learn everything you need to know about hiking this famous peak.
Before we start, your most important takeaway from this article is that you have to purchase your tickets in advance (as far in advance as possible) because they will sell out. The Peruvian government limits the amount of people who can visit Machu Picchu every year and this also goes for the hikes within Machu Picchu – both Huayna Picchu and Machu Picchu Mountain.
The limit for the Huayna Picchu hike is 400 people per day and is divided up into three entrance times:
Machu Picchu Tours:
| Group | Machu Picchu Entrance Time | Huayna Picchu Entrance Time |
| #1 | After 6:00 am | 7:00 am – 8:00 am |
| #2 | After 7:00 am | 7:00 am – 8:00 am |
| #3 | After 8:00 am | 10:00 am – 11:00 am |
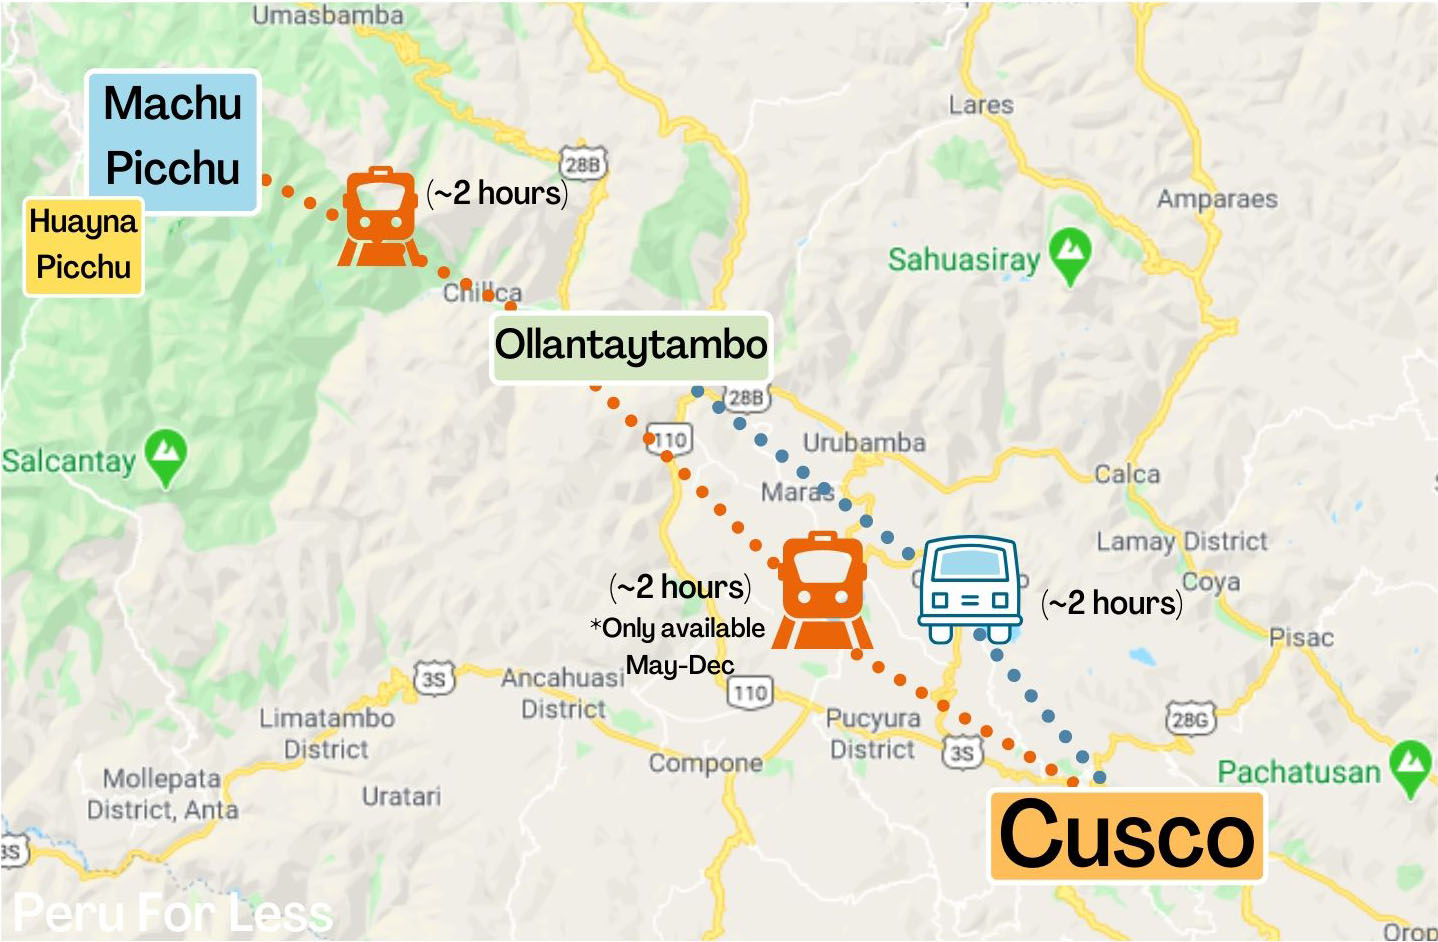
The route from Cusco to Huayna Picchu. Map by Peru For Less
The quickest and easiest way to get there is by starting in Cusco. Even though the distance between Cusco and Machu Picchu is only about 50 miles (74.7km), it takes about 4 hours to get there due to the winding valley and drop in elevation. From Cusco, you can take a train all the way to Aguas Calientes during the dry season (May-Dec). However, during the rainy season (Jan-Apr), you must take the bimodal option with a bus from Cusco to Ollantaytambo and a train the rest of the way. Both options take you through the Inca fortress town of Ollantaytambo in the Sacred Valley – not a bad spot to spend a night if you have the extra time!
As soon as you’ve left Ollantaytambo, enjoy the train ride through the breathtaking valley to the little town of Aguas Calientes. Our recommendation is that you arrive in Aguas Calientes, the town below Machu Picchu, the night before if you’re planning on doing a hike. Not only does this offer a more relaxed itinerary, but it also gives you that extra sleep, especially if you have the 6am entrance.
The last leg of the trip has two options: bus or walk. Taking the bus (just $12 per person) is a short 30 minute ride up to the Machu Picchu entrance. If you choose to walk up, this will add at least another hour or more (depending on your fitness level) and will take you on a hiking path that cuts vertically up through the winding switchbacks of the bus route. Keep in mind that walking up can drain your energy, so choose wisely to make sure you enjoy your experience.
After reaching the entrance, you’re only a short 15 minute walk from the trailhead! Follow the signs through the sanctuary and you will end up at the Huayna Picchu checkpoint. You’ll see a small hut and a Huayna Picchu map, which gives you a good idea of the hike to come. Enter at your allotted time and your adventure begins!
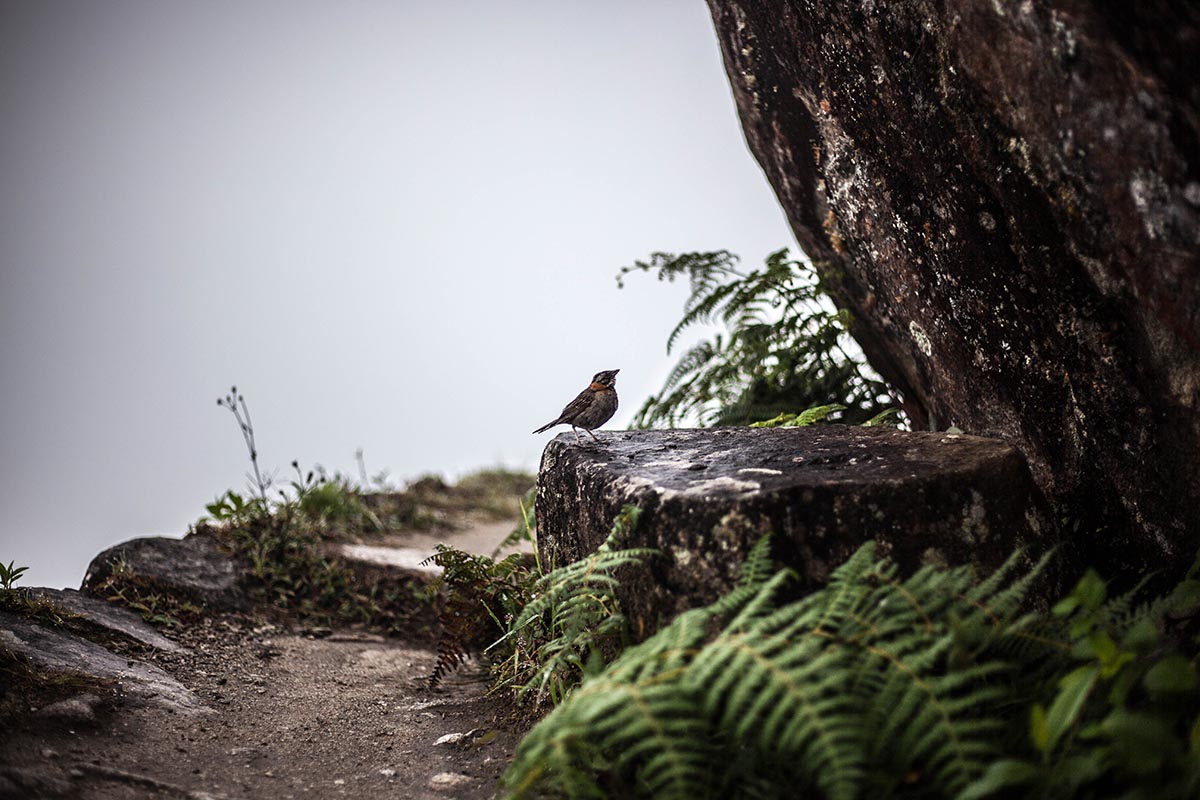
An example of foggy conditions on a hike similar to Huayna Picchu. Photo by Peru for Less
When is the best time to hike Huayna Picchu? The short answer is between June and September. These months are considered the dry season in Peru, so you’re less likely to run into rain and storms. However, if you want to beat the crowds, traveling between December and March will bring less tourists. To simplify your decision, the table below offers all the pros and cons for each season so you can decide what works best for you:
| Season | Pros | Cons |
|
Rainy Season (Dec-Mar) |
|
|
|
Dry Season (Jun-Sep) |
|
|
For the months in between, the season is in transition, so most of the time you will see both rain and sun during the day.
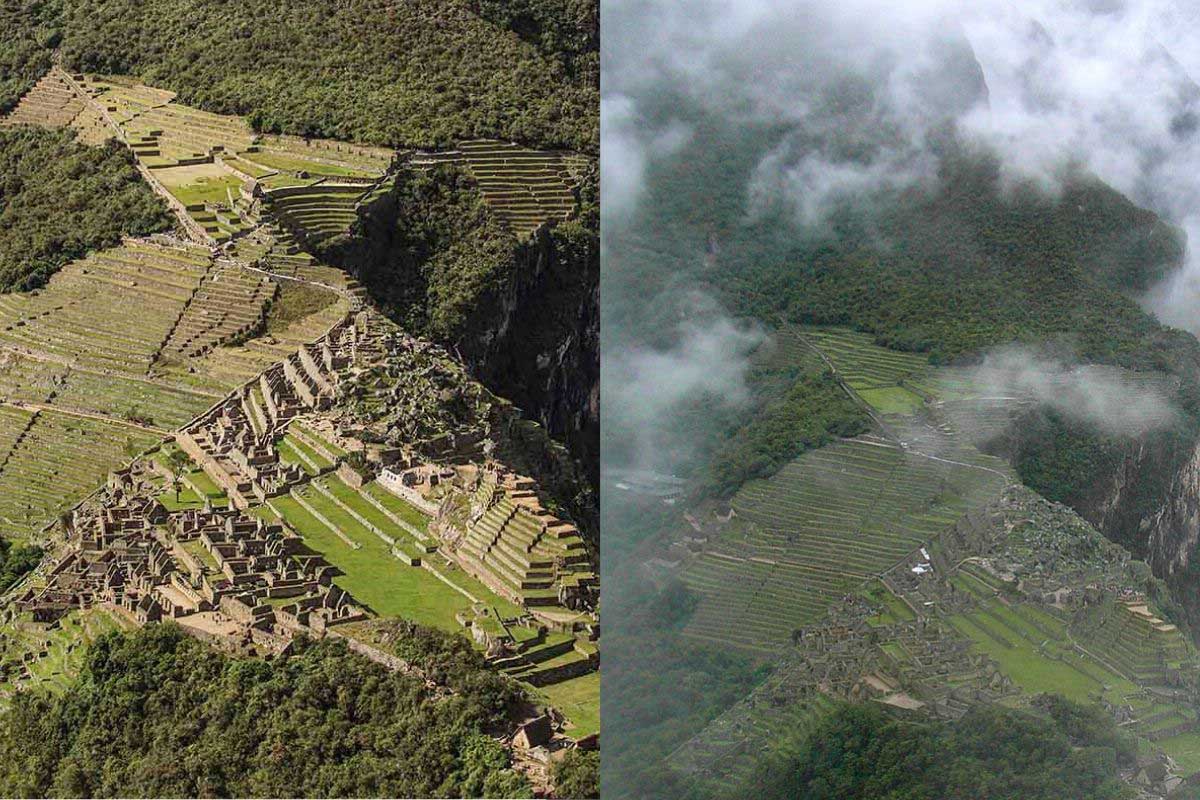
A comparison of a sunny and cloudy view of Machu Picchu from the Huayna Picchu hike. Photos by Peru For Less and bullets95 on Flickr
Once you’ve decided on the best time of year, you can choose the best option for what time of the day you want to see Huayna Picchu. Read more about the best time to visit Machu Picchu here.
1st Group | 7:00 am Hike Time
2nd Group | 10:00 am Hike Time

Hikers climb with their gear on their way up Huayna Picchu. Photo by Peru For Less
You’ve purchased your tickets, you’ve booked your flights, but what should you bring? Since the climate in Machu Picchu can be somewhat unpredictable, we’ve come up with a sure-fire list to make your Huayna Picchu Mountain hike unforgettable:
You’re probably wondering how does one even begin to deal with this? Thankfully, there are four easy ways you can set yourself up for success when traveling to areas of high altitude and dealing with Huayna Picchu’s elevation.
Learn more in our altitude sickness guide.
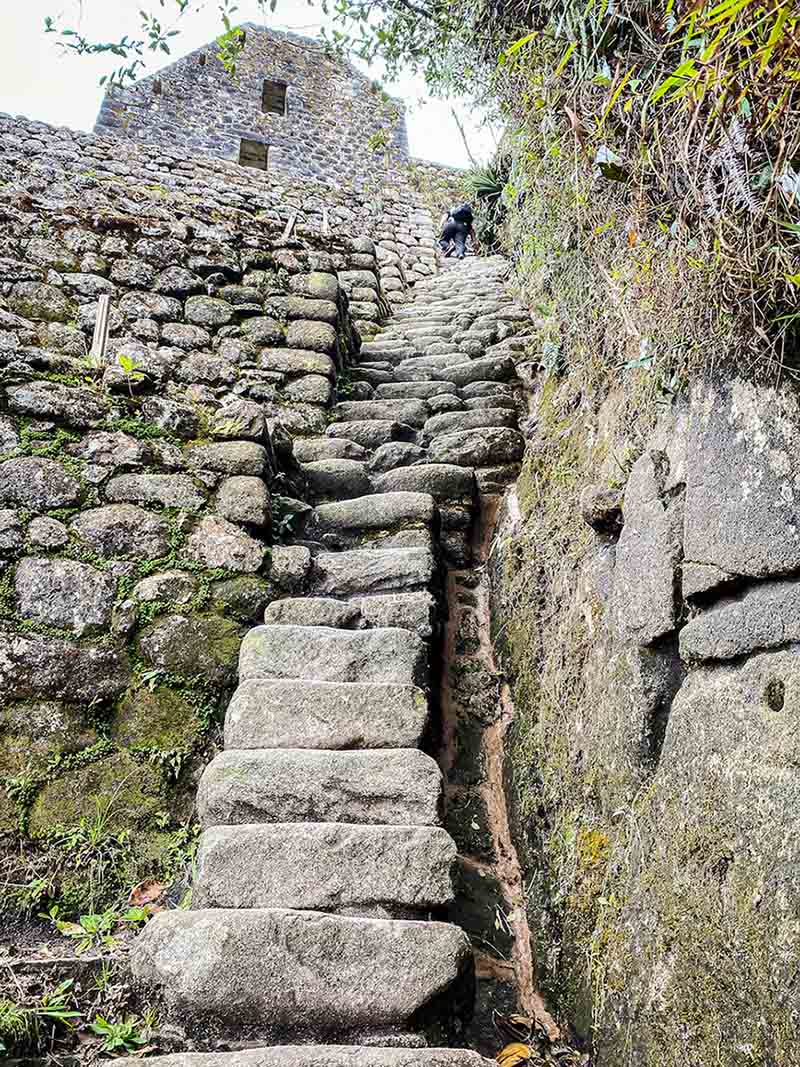
A view looking up at the Stairs of Death on the last push to the summit on the Huayna Picchu hike. Photo by Daniella Beccaria
Now that you know about the tickets, getting there, when to go and what to pack, you may be wondering, what is the hike actually like? This step-by-step guide takes you through each part of the trail:
The hike begins at the checkpoint next to the sacred rock (Wank’a Quechua) on the far side of the Machu Picchu citadel. At your allotted time, you present your ticket and sign in before you begin walking along the path. It begins relatively flat, but quickly changes to windy ups and downs through rocky terrain and beautiful green scenery.
As you make your way toward the mountain, the hike changes to steep switchbacks. You’ll most likely be hiking alongside or near other groups, so make sure to be courteous on the trail and let people go ahead of you if they want to pass, or politely ask to pass if you are prepared to surge ahead. Once you’ve made it through the switchbacks, you’ve reached the infamous stairs.
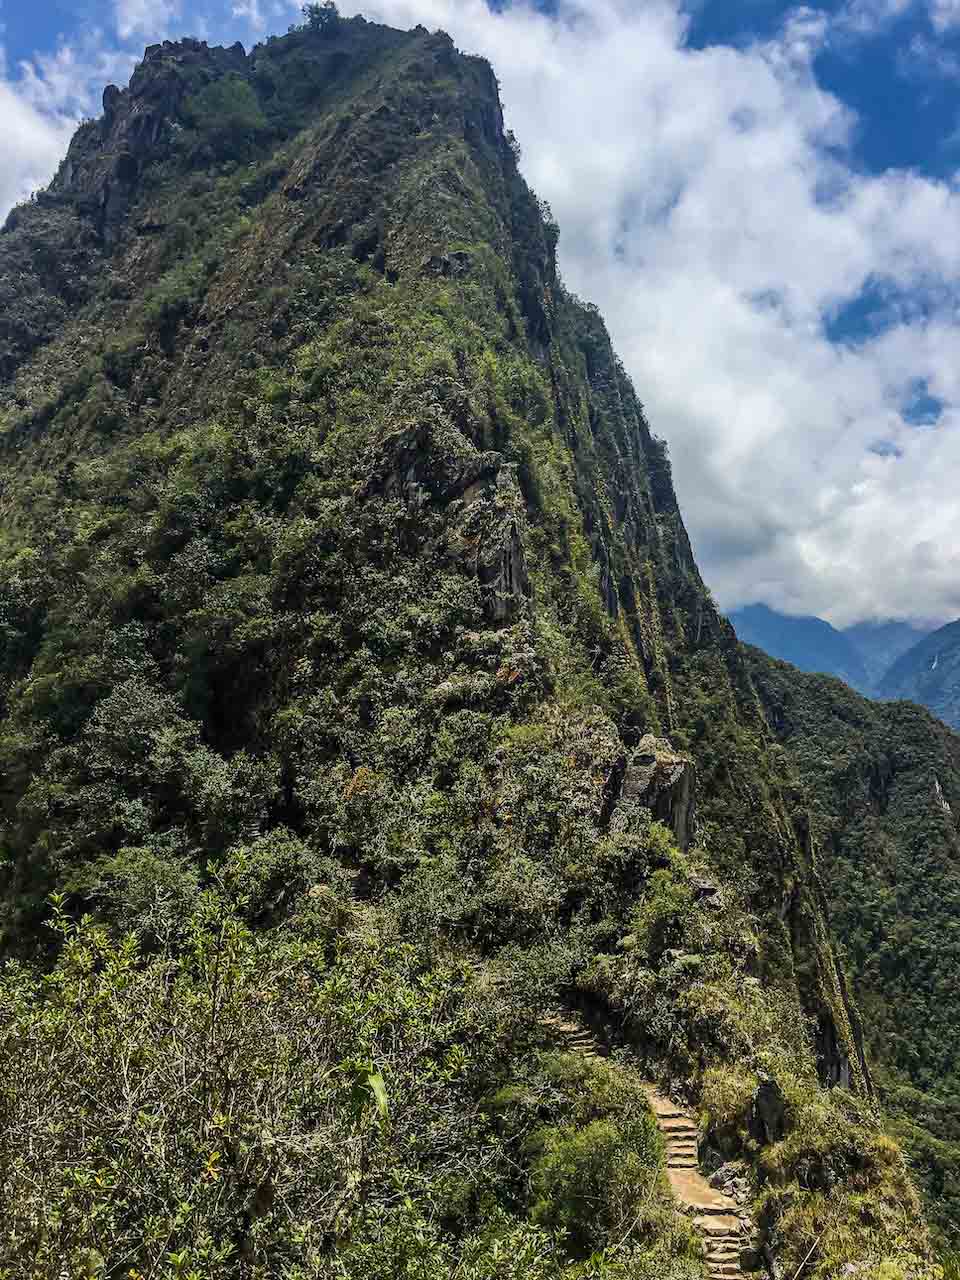
The Huayna Picchu trail leading up the mountain. Photo by Daniella Beccaria
These Huayna Picchu “Death Stairs” or “Stairs of Death” deserve their own section because of their sheer architectural magnificence (and scary reputation). These steep steps are original Inca-built stairs dating back to the 1400s. Don’t let that deter you, though. The Incas were masters of their craft and created architectural marvels with better structural integrity than many modern buildings.
Looking up may be intimidating, but looking down is worse, so keep your eye on the prize. And make sure to utilize the hand rails and ropes to keep you moving forward. If you feel dizzy or need a quick break, just step to the side on one of the terraces where you can take a breather on flat ground. If you’re still wondering, is Huayna Picchu dangerous? The answer is no. Not only are there guides stationed on the trail to help you, but there are also rails, ropes and other people around you to keep you safe.
At this point you’ve made it through the difficult section and landed at the summit where ruins start popping up around you. This is a great time to explore around and snap your first photos. This is also the time when you need to make a choice: continue on the main trail, or take the side trail to the Temple of the Moon. The second option adds an extra 45 minutes in total, but is well worth seeing. This 1,500 year-old temple built within caves is a mystery to modern-day historians but was possibly used for rituals, sacrifices, or worship of the moon. In order to reach this area, you must follow the side path that takes you down and around the backside of the mountain and eventually winds back up to the main path that takes you back to the entrance.
If you decide to stay on the main path, you can enjoy the views from the “Throne of the Inca” that looks out over Machu Picchu. This rock formation is a perfect spot for photos and taking in the beauty of the area. You’ll see sweeping views of mountain tops, ruins and the winding river below. But don’t linger too long – the rest of the hikers will arrive behind you and can only go one-way. You need to keep moving in order to prevent a traffic jam. From the viewpoint, climb down the ladder and under the “Throne” to begin the descent.
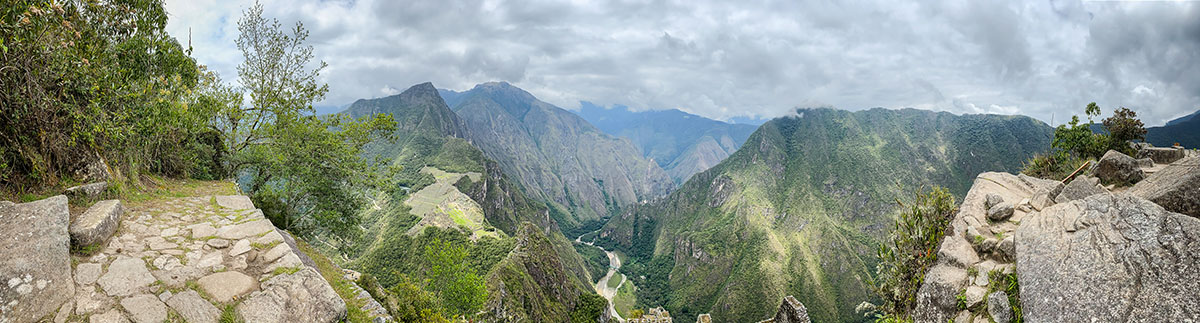
A panoramic view from Huayna Picchu summit on a partly cloudy day. Photo by Daniella Beccaria
Similar stairs that took you up will lead you down the mountain back toward the checkpoint. Step carefully to ensure your safety and take your time – don’t rush. This is also a nice opportunity to take in the last views before exiting the hike. When you arrive back at the Huayna Picchu entrance, sign out and make your way to the Machu Picchu exit where you can rest up, eat and re-hydrate.
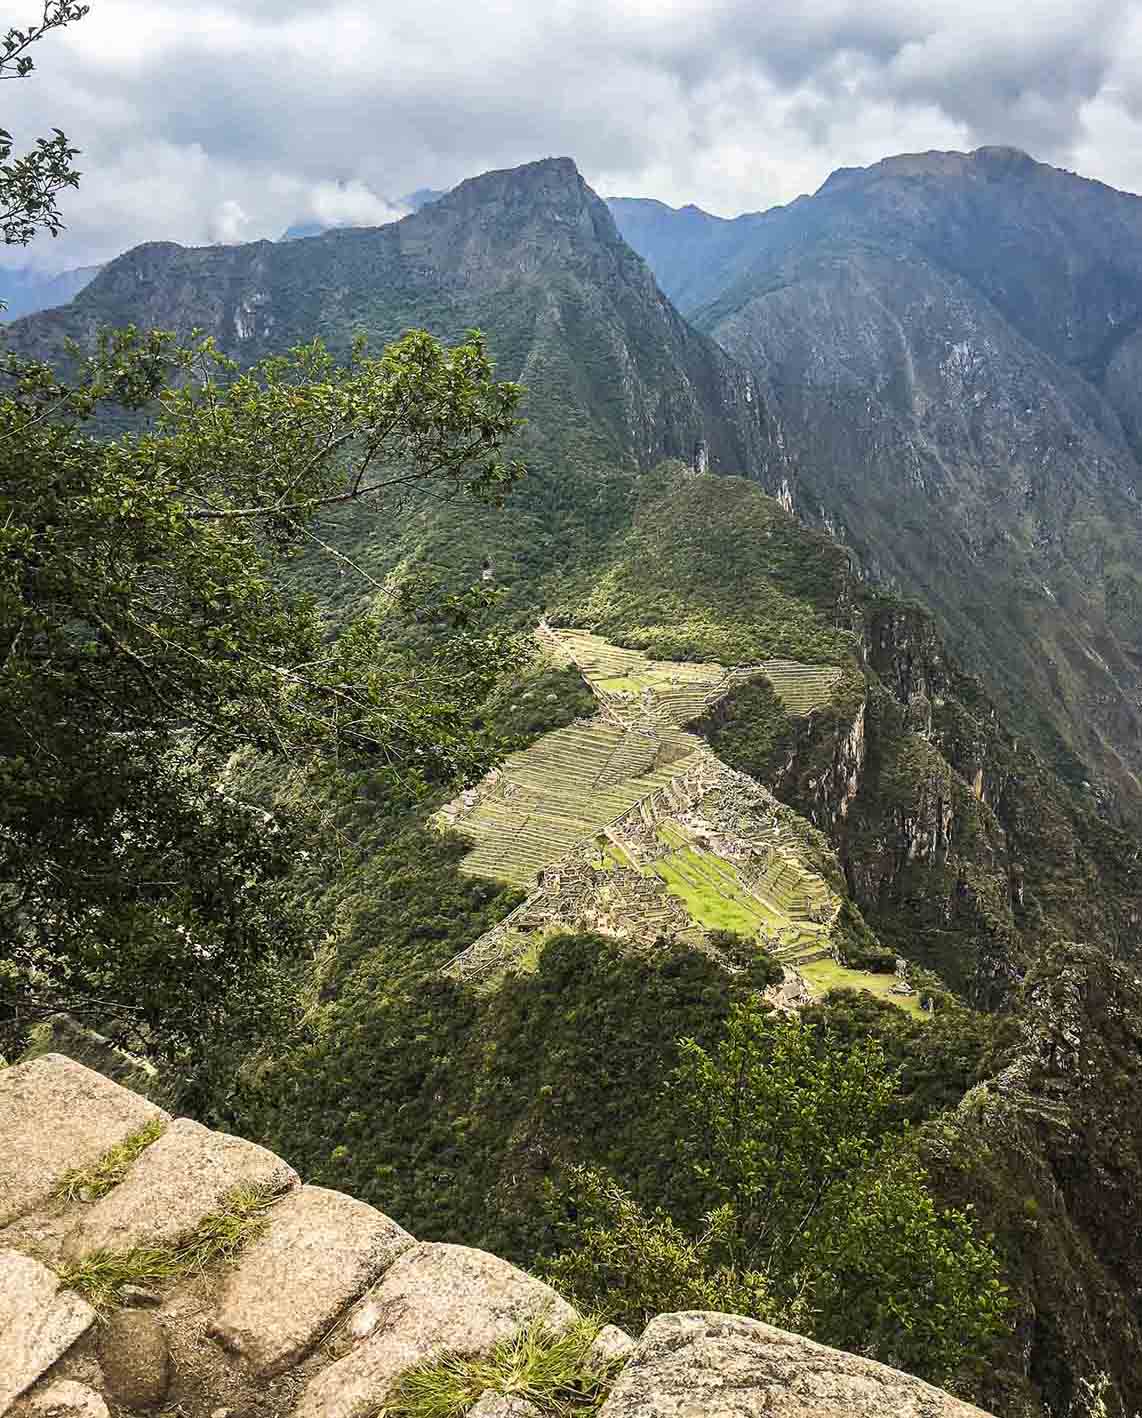
The view of Machu Picchu Mountain from the Huayna Picchu summit. Photo by Daniella Beccaria.
Huayna Picchu may be the more popular option, but if you’re looking for a bit more difficulty, then the Machu Picchu Mountain hike is your best choice. Situated on the opposite end of the Machu Picchu citadel, this hike is roughly 4 hours round trip and 10,007 ft (3,050 m) above sea level. In comparison, it’s about 1,083 ft (330 m) more elevation gain than Huayna Picchu – so you’re definitely in for a workout. Though there are no stairs of death, this hike is still steep and does not have any ruins at the top. It does, however, have a nearly 360 view of the mountains, Machu Picchu and the river. It is a worthy competitor of the beloved Huayna Picchu hike, so make sure you consider it before purchasing tickets.
Yes. We couldn’t recommend hiking Huayna Picchu more. The terrain may be steep, but the Huayna Picchu view is unforgettable. This hike takes your visit to Machu Picchu to the next level – both figuratively and literally! Start planning your next adventure today and connect with one of our travel advisors.


Email: [email protected]
Sign up to receive our newsletter for great articles, stunning photos, and special deals.